Repairing ceiling plaster varies depending on the damage. Each problem, from minor issues like simple cracks to sagging or water damage, needs a specific approach.
Understanding the right method for each type of damage can save you both time and money. This DIY guide will show you how to tackle each issue.
Before diving into the repair process, it’s essential to prepare adequately for the task at hand. This part is fit for all ceiling damage types.
Gather the Necessary Materials and Tools
Materials:
- Plaster or Joint Compound – To fill cracks and holes.
- Drywall Sheets – For patching larger holes or damaged areas.
- Drywall Tape – To cover seams between pieces of drywall.
- Primer and Paint – To finish the surface uniformly after repair.
- Screws – For securing drywall to the ceiling joists.
- Adhesive – Useful for attaching plasterboard or as part of the patching process.
- Mesh Tape – Reinforces plaster repairs to prevent cracks from reappearing.
- Sealant – For waterproofing, especially if water damage was involved.
- Sandpaper or Sanding Sponge – To smooth out dried plaster or joint compound.
Tools:
- Ladder or Scaffold – To safely reach the ceiling.
- Putty Knife – For applying and smoothing plaster or joint compound.
- Drywall Saw – To cut out damaged drywall.
- Trowel – For applying and smoothing plaster.
- Drill with Screwdriver Bits – For installing drywall screws.
- Paintbrush and Roller – For priming and painting.
- Mixing Paddle and Bucket – For preparing plaster or joint compound.
- Utility Knife – For cutting drywall tape and trimming edges.
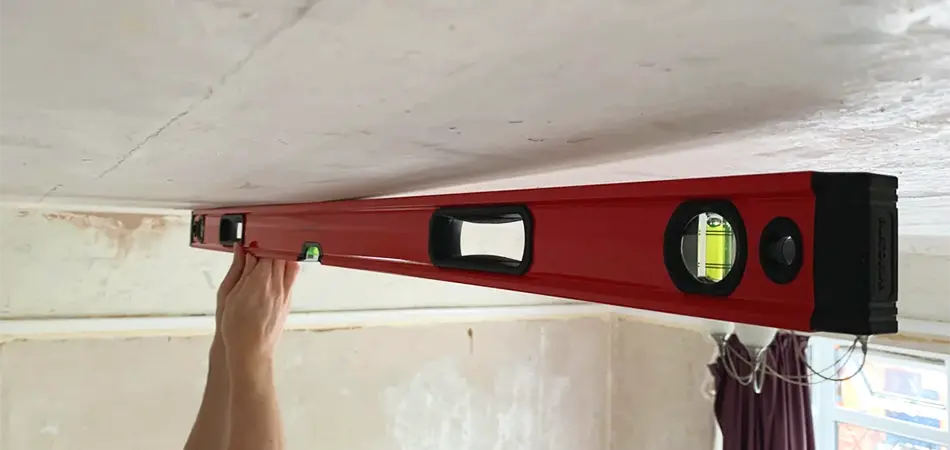
- Level and Tape Measure – To ensure installations are even and properly sized.
- Stud Finder – To locate ceiling joists for secure drywall attachment.
- Face Mask and Safety Goggles – For personal protection during cutting, sanding, and mixing.
- Drop Cloths or Plastic Sheeting – To protect floors and furniture from dust and spills.
I know this is supposed to be a DIY task, so you might not have all the tools. However, having these tools on hand will ensure a more efficient repair process.
Identify the Damage
Assess the damage to determine the extent of the issue. It will guide your plaster ceiling repair process.
Different damage types require different repair solutions. It can be small holes, a sagging ceiling, water-damaged plaster, or ceiling cracks.
By identifying the damage beforehand, you can prepare the appropriate repair method and ensure a successful repair outcome.
Prepare the Work Area
Begin by clearing out space and protecting floors and furniture from dust and debris.
Lay down drop cloths or plastic sheeting to cover the area beneath the repair site. This will capture any falling plaster, dust, or paint, keeping your space clean.
Creating a clean and organized work environment will help prevent any further damage to your surroundings.
Ensure you have a ladder or scaffold set up securely, so you can comfortably reach the ceiling.
Are you all set? Good. Now let’s look at how to repair ceiling plaster for each type of issue.

How to Fix Ceiling Cracks
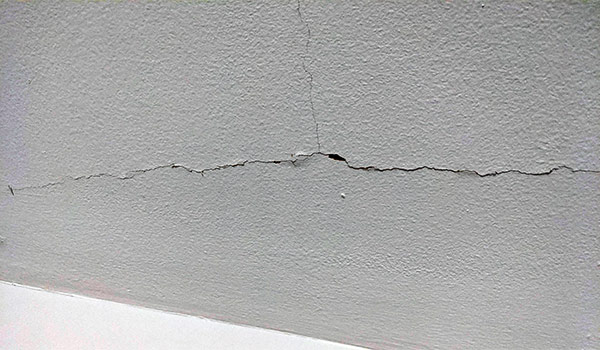
If the cause of the ceiling cracks is only normal wear and tear, repairing them is the simplest DIY task of all.
Here is a quick step-by-step guide to help you fix minor cracks in the ceiling.
- Use a putty knife to scrape away loose plaster around the crack.
- Apply a plaster or joint compound that is suitable to fill in the crack.
- Use a trowel to spread out the patch to blend it seamlessly,
- Allow the plaster patch sufficient time to dry completely.
- Once it has dried, sand the area to achieve a smooth finish using sandpaper.
For detailed instructions on how to repair ceiling cracks, please visit this page.
If you’re often patching your cracked ceiling, it’s worth considering a proper ceiling crack repair service for a more durable solution.
In a different scenario, if the ceiling cracks are caused by structural or construction issues, you might need to consider a complete ceiling renovation.

How to Repair Water Damage Ceiling
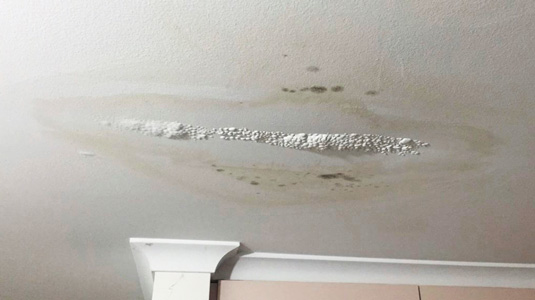
Repairing a water-damaged ceiling can be a bit tricky as a DIY project. It involves several detailed steps and requires careful handling to avoid further damage.
If you’re unsure about safely handling the repair yourself, it’s wise to call in a professional for water damage ceiling repair. They can ensure the job is done correctly and safely.
If you feel prepared and want to proceed on your own, here’s how to fix a water-damaged ceiling:
- Identify and stop the water source to prevent further damage. (This one is very important!).
- Assess the extent of the water damage to the ceiling.
- Use a utility knife to remove any damaged drywall or plaster.
- Use fans and dehumidifiers to completely dry the affected area.
- Cut to fit a new drywall to the open space and secure it with screws.
- Apply joint tape and cover with joint compound, smoothing it out as you go.
- Once dry, sand the area smooth for painting.
- Apply primer and then paint to match the rest of your ceiling.
Water damage can wreak havoc on your plaster ceiling, leading to a host of issues that require immediate attention.
To prevent future water damage, address any underlying issues that may be causing leaks. It can be a leaky roof or plumbing issues.
Have a respective professional inspect and identify these issues before any repair, You can prevent further water damage.

How to Repair Sagging Ceiling
When dealing with a sagging plaster ceiling, it’s crucial to provide adequate support to prevent further damage.
Depending on the cause and severity of the sag, you have a few options on how to fix a sagging ceiling.
Repair Method 1: Using Plaster Washers for Minor Sags
- Check the ceiling for minor sags where the plaster is still intact but detached.
- Attach plaster washers to reconnect the plaster to the lath securely.
- Once the plaster is secure, finish with matching paint or texture to blend the repair.
Repair Method 2: Using Timber Props for Significant Sags
- Set up timber props to support the sagging area from below.
- Remove any loose, unstable or damaged plaster.
- Apply a suitable adhesive and lift the sagging plaster back into place.
- Hold it with the props until the adhesive sets.
- Once the plaster is dry, complete the repair with paint or texture.
Repair Method 3: Installing Drywall Overlay for Extensive Damage
- Remove all severely damaged plaster.
- Cover the area with new drywall sheets to reinforce the ceiling.
- Secure the drywall to the ceiling joists using screws.
- Apply joint tape and cover with joint compound, smoothing it out as you go.
- Once the joint compound dries, sand it smooth and apply a primer.
- Finish with paint.
A sagging ceiling can be tricky; there may be more serious underlying issues. Consider hiring a specialist for sagging ceiling repair to ensure the job is done correctly.

When to Hire a Professional Ceiling Fixer
Hiring a professional ceiling fixer is advisable under the following circumstances:
- Complex Damage. If the ceiling damage extends beyond simple cracks or peeling paint—such as structural issues or extensive water damage—it’s best to consult a professional.
- High Ceilings. Working on high or hard-to-reach ceilings poses safety risks and often requires specialised equipment. Professionals are trained to handle these challenges efficiently.
- Historical Ceilings. Older homes with historical significance have ceilings that may require preservation techniques only a specialist would know.
- Time Constraints. If you need a quick repair due to imminent safety concerns or upcoming events, a professional can ensure timely and effective restoration.
In these scenarios, a professional ceiling repairer can provide the necessary skills and tools. You can have peace of mind that the job will be done safely and correctly.
Talk about professional ceiling fixers, we are a reputable ceiling repair contractor in Perth. We specialise in addressing all types of ceiling issues, from minor repairs to major renovations.
Contact us, Perth Ceiling and Walls, to discuss your ceiling repair needs and get a free quote today.
Reviewed by
Aaron Kumar
Aaron Jefferson Kumar. The owner and operator of Perth Ceiling and Walls. With hands-on expertise in plasterboard ceiling and wall repairs and installations, Aaron takes pride in ensuring every project meets the highest standards of quality and craftsmanship. His direct involvement in both the business and the fieldwork positions him as a trusted person on all things related to ceiling and wall solutions.
